There’s one question I get asked on a daily basis: “How do you get your perfectly smooth and nice looking backgrounds?”
It’s actually not that difficult, let’s have a look at what it takes.
The Basics
There are a few simple factors that determine how smooth and out of focus your background is.
- Distance between you and the bird
- Distance between the bird and the background elements
- Lens used
- Settings Used
The further the background is behind the bird, the more out of focus and smooth it will be. Secondly, the further away you are form the bird, the further the background needs to be behind the bird to get it smooth and vice versa.
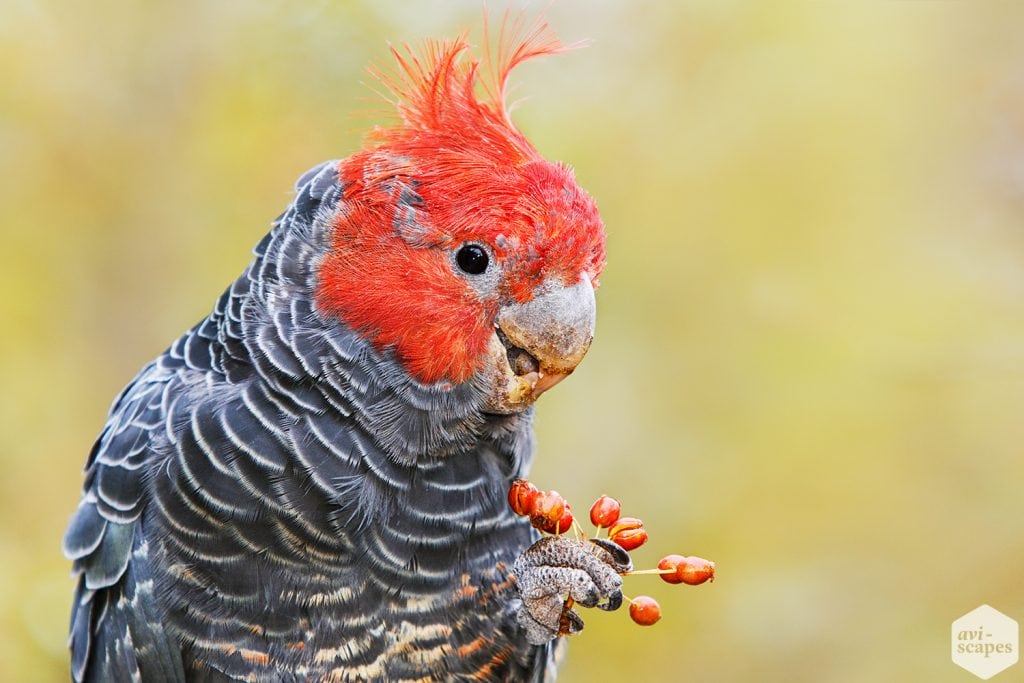
This Gang Gang Cockatoo portrait image is a great example. I was really close to the bird, so the background, which was only a few meters away is already totally blurred, even with just a short zoom lens.
5D Mark IV – 70-200 L IS II – 600 EX flash for fill
Making Of
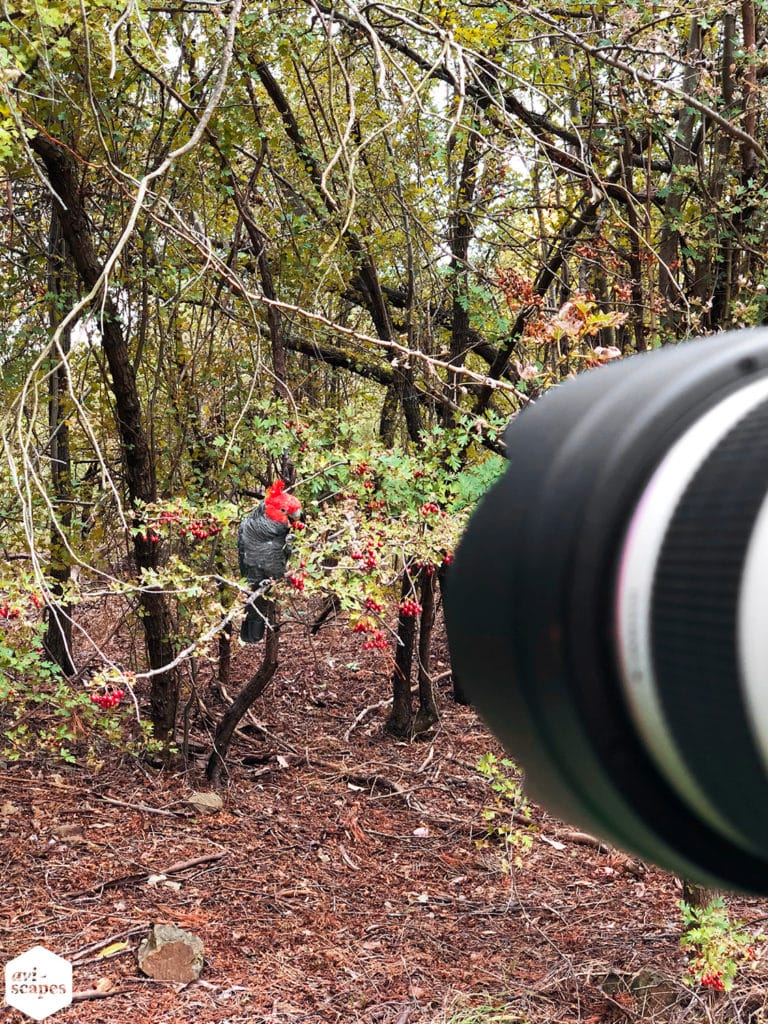
So how did I get a smooth background in such a sticky mess? It’s simple, I moved around, bend down on one knee and eventually managed to maneuver myself into a position good position. The key was to find a gap in the branches behind the bird that allowed the camera/lens to make the background smooth enough. If I had just stood right in front of the bird, I would have had lots of ugly sticks behind the it.
The Lens
Generally, the longer your lens, the easier it is to get smooth backgrounds and prime lenses beat out zooms by a fair margin in that regard. My 600mm prime lens produces these kind of backgrounds almost by default. With a shorter zoom lens like a 100-400 you have to work a bit harder to get a similar look. The shorter focal length and build of a zoom, require you to be closer to the bird and the background to be further away. This makes it quite tricky in certain situations and is one of the main reasons people use the big prime lenses. But as you can see above, it’s possible, even with a 70-200.
The Camera
Your camera actually doesn’t have that much of an impact, besides the settings you use. Full Frame sensors usually have the smoothest output.
The F-Stop
The f-stop used can have a big impact, especially when the background is not too distant. However, it’s not as simple as always shooting wide open. That would definitely give you the smoothest backgrounds, but introduces other problems. Usually when shooting wide open the depth of field is not enough to cover the whole bird and as a result parts of the bird, like feet and tail already start to get out of focus. To counter that I like to shoot usually at F8. I have found that to be a good compromise.
Here are two extreme RAW examples. Same bird and perch. First image shot at F16, second image shot at F4.
F8 would be a good middle ground in this situation. As you can see, opening up the f-stop within reason, can help with a smooth background. Ideally, however, the background is far enough away, that you can use F8 and higher.
Extenders
Using extenders has an impact as well. The increased focal length results in smoother backgrounds than the naked lens. Because of that, I sometimes step a few steps back and use and extender, rather than the bare lens, cause it gives me better in camera backgrounds. This only really works with good prime lenses, though.
Stay Focused
A lot of people make the mistake to focus too much on the birds and not the surroundings and the potential a scene might has to offer. I always tell others when we shoot together to not just fire away, but to always stay focused on how to get the most out of the situation in front of us. To me finding the bird is important, but it’s equally important to stay focused on things like the background and head angle among others. Only by working all variables, you get the best results.
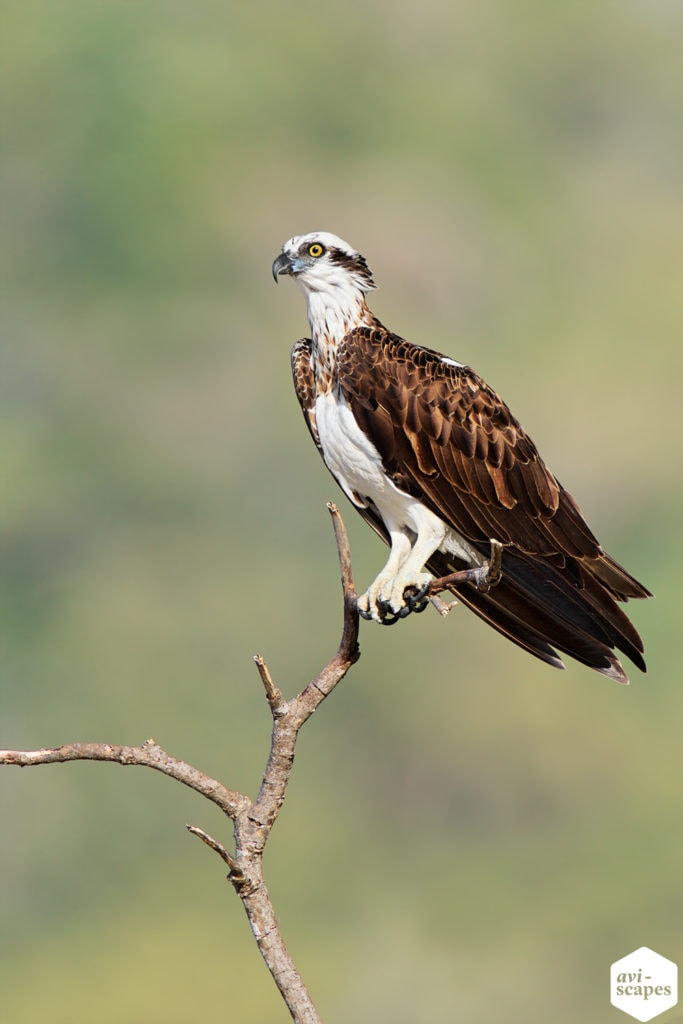
These two Osprey images show what a dramatic impact a few steps to one side can have on your backgrounds. The first image is the one I took when I arrived at the scene, but it was a kinda steep angle and looked boring with the plain blue background.
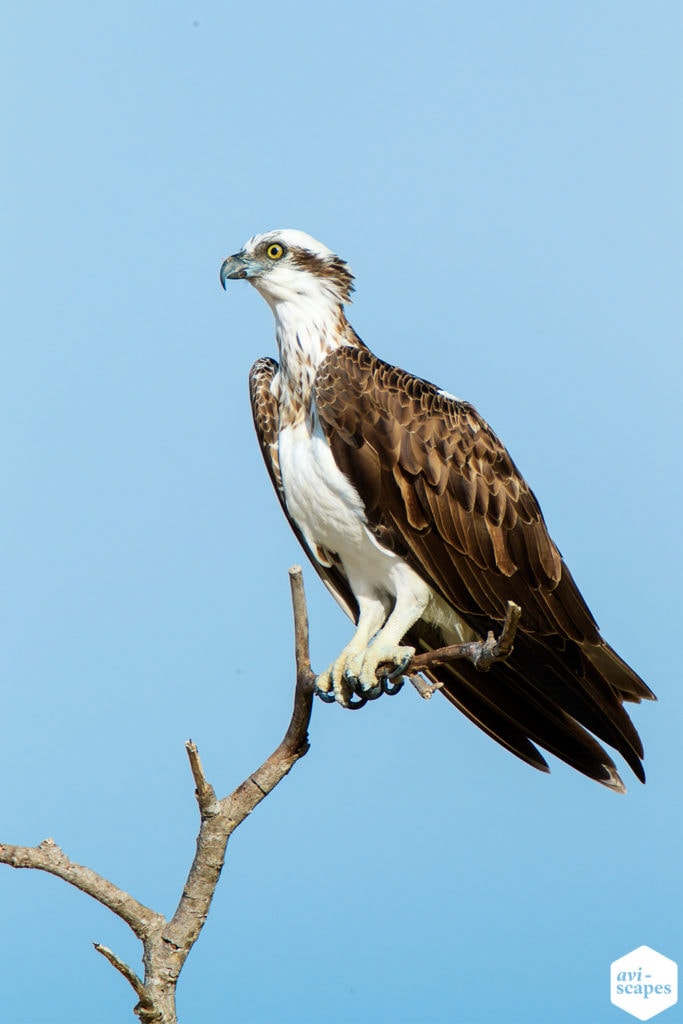
I had a few distant hills to one side, so I decided to walk back a bit to lessen the steep angle and move around, to get the nicely coloured hill behind the bird. So with just a few steps, I was able to dramatically change the look of my images to a much better result in my opinion.
More Backgrounds
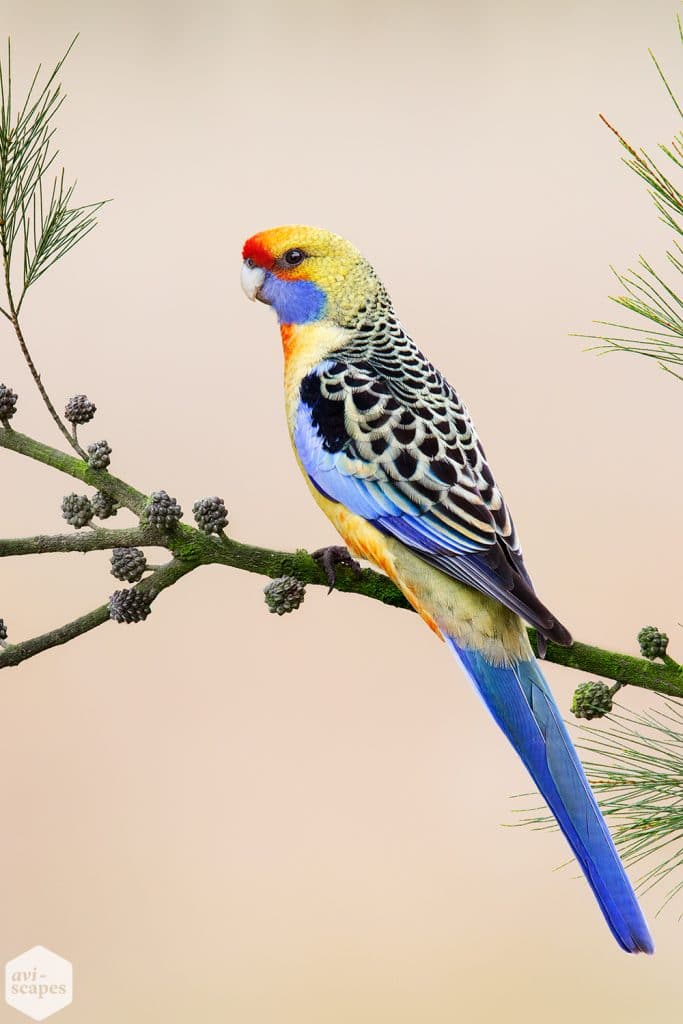
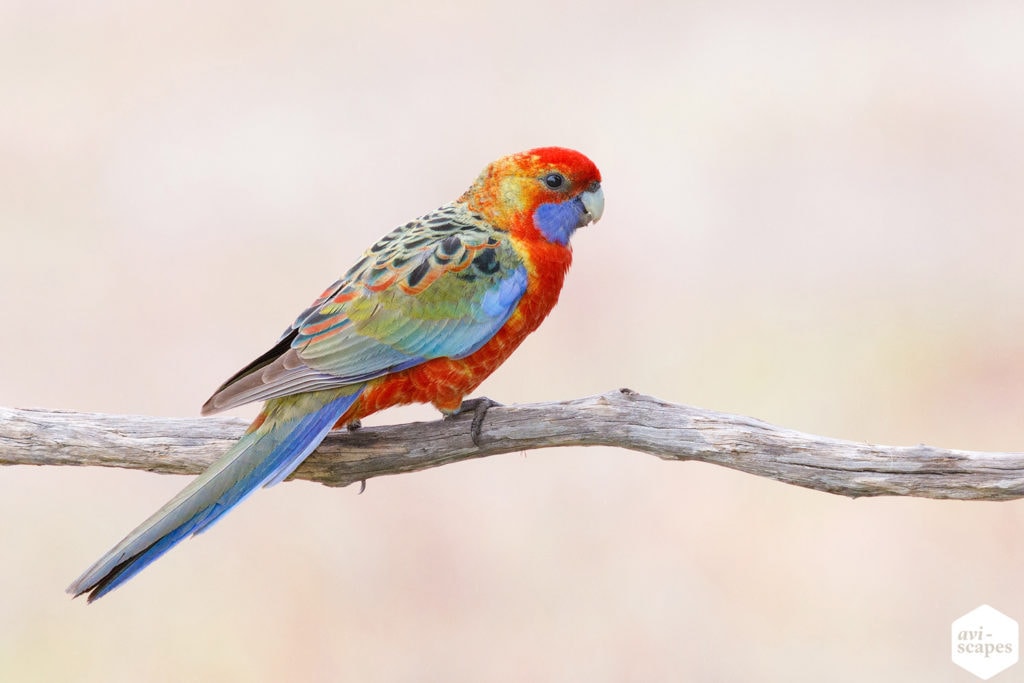
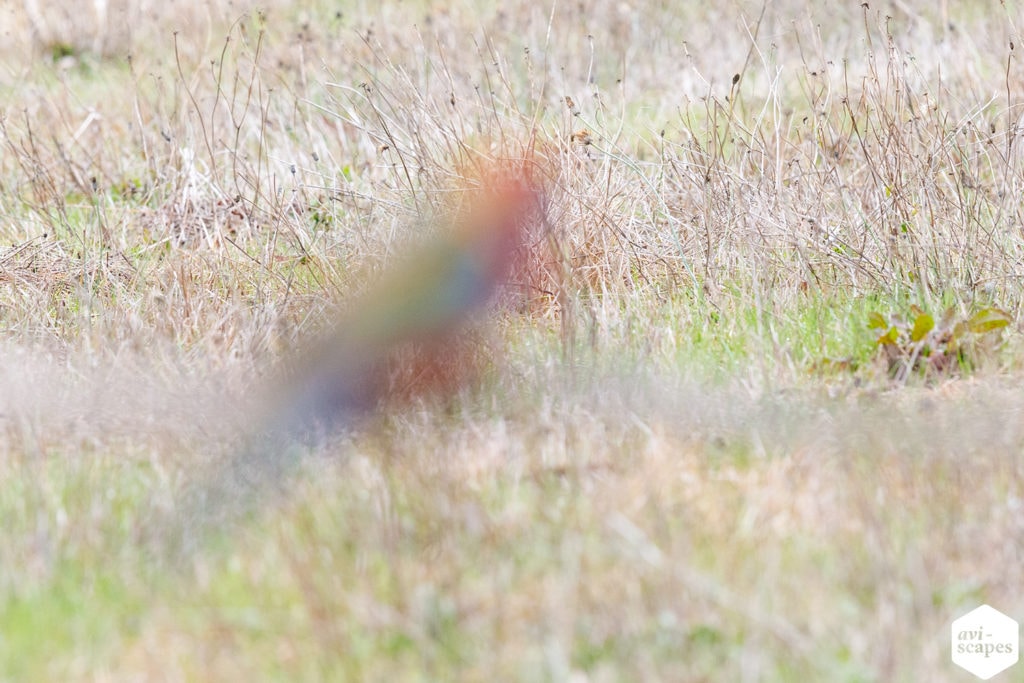
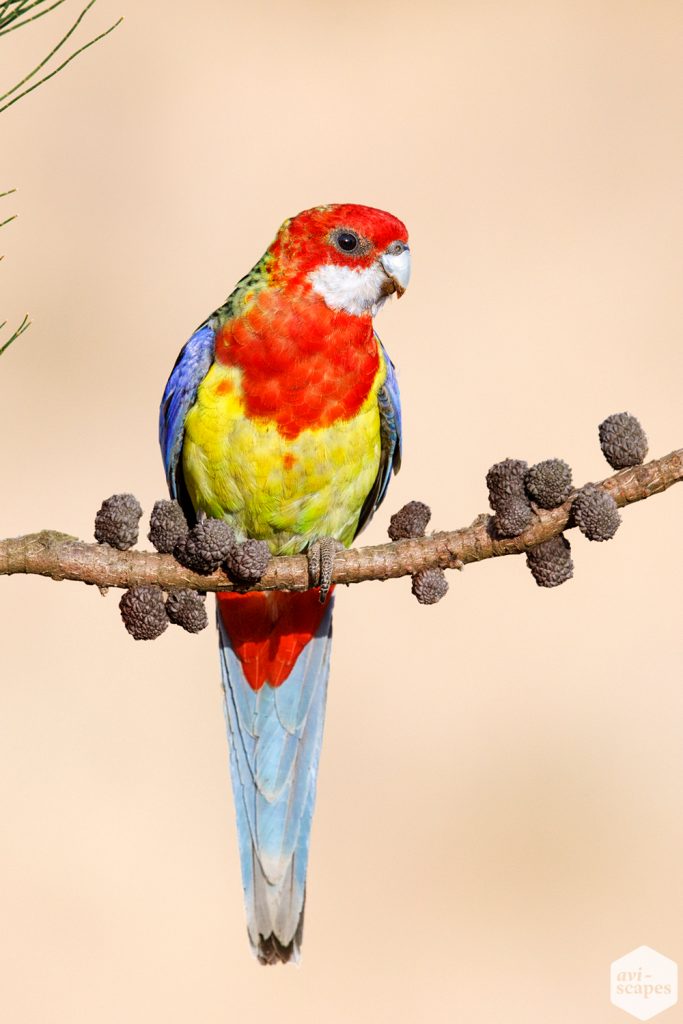
Let’s have a look and a stunning Yellow Rosella from one of my favourite spots. What could the background be in this image?
Below are two examples from the same spot. One images focused on the bird and one focused on the background. Both are unedited RAW images and you can see how nicely the dry grass looks already in camera.
This and the above image were shot with 600mm and the background is about 10m behind the perch. Generally softer elements like grass are easier to dissolve in camera than things like branches with strong dark lines.
Setting up
Here’s an example from Perched Episode 1, of an ideal set up, where the background is a distant hill behind the perches and allows for smooth backgrounds, even at F11.
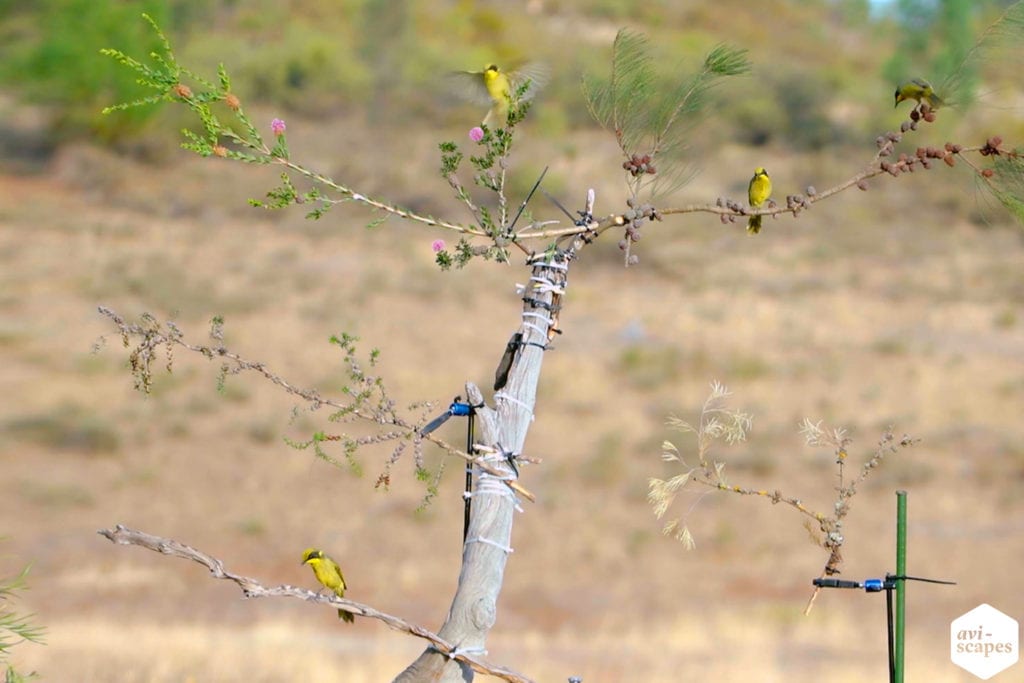
And some images from this set up.
5D Mark IV – 600 L IS II – 1.4x TC
I am talking about backgrounds, setting up and what to do if the background is terrible thoroughly in Perched episode 1. Check it out here if you haven’t yet.
Conclusion
It’s all about getting some distance between the bird and the background. The shorter your focal length, the more distance you need for a smooth background look. To get the best and most consistent results, it’s great if you can set up in a good spot and get the birds come to you. This is what I usually do. That way I can control what my final image will look like. If you prefer to roam around a stalk birds, you need to be creative, like I was above with the Gang gang Cockatoo and Osprey. Sometimes one or two steps to the side can yield drastically different results. To get stunning backgrounds, you constantly have to think about them when taking your images. After a while it will become second nature and you will see opportunities everywhere.
Also check out my free eBook “5 Common Mistakes Almost Every Bird Photographer Makes – And How To Avoid Them”